Line 2,629:
Line 2,629: =====On Hard difficulty=====
=====On Hard difficulty=====
''Note that this battle still occurs as a tag battle against the player.''
{{Party/Tag
{{Party/Single
|color={{black color light}}
|color={{Black color light}}
|bordercolor={{black color dark }}
|headcolor={{Dark color}}
|headcolor={{black color}}
|bordercolor={{Dark color dark}}
|color1={{dark color light}}
|bordercolor1={{dark color dark}}
|headcolor1={{dark color}}
|color2={{ghost color light }}
|bordercolor2 ={{ghost color dark}}
|headcolor2={{ghost color}}
|game=Insurgence
|class=Champion
|sprite=Tobias.png
|sprite=Tobias.png
|class2=Champion
|sprite2=Graham.png
|name={{color2|000|Tobias}}
|name2={{color2|000|Graham}}
|size=80px
|size=80px
|size2=80px
|location=Pokémon League
|prize={{pdollar}}21600
|prize={{pdollar}}21600
|class=Champion
|pokemon1 =4
|classlink=Champion
|pokemon2 =4}}
|name={{color2|000|Tobias}}
|game=XY
|location=Pokémon League
|pokemon=4}}
|style="margin:auto"|{{Pokémon/6
|style="margin:auto"|{{Pokémon/6
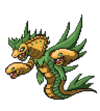
|ndex=442
|ndex=442
Line 2,668:
Line 2,677: |move3type=Flying|move3=Tailwind|move3cat=Status
|move3type=Flying|move3=Tailwind|move3cat=Status
|move4type=Flying|move4=Roost|move4cat=Status}}
|move4type=Flying|move4=Roost|move4cat=Status}}
{{Party/Div|Black color light}}
|style="margin:auto"|{{Pokémon/6
|style="margin:auto"|{{Pokémon/6
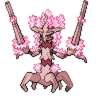
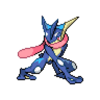
|ndex=658
|ndex=658
Line 2,695:
Line 2,703: |move3=Leaf Blade|move3type=Grass|move3cat=Physical
|move3=Leaf Blade|move3type=Grass|move3cat=Physical
|move4=Rock Slide|move4type=Rock|move4cat=Physical}}
|move4=Rock Slide|move4type=Rock|move4cat=Physical}}
{{Party/Footer}}
{{Party/Div |color={{black color light}}}}
{{Party/Single
|color={{Black color light}}
|headcolor={{Ghost color}}
|bordercolor={{Ghost color dark}}
|sprite=Graham.png
|size=80px
|prize={{pdollar}}21600
|class=Champion
|classlink=Champion
|name={{color2|000|Graham}}
|game=XY
|location=Pokémon League
|pokemon=4}}
|style="margin:auto"|{{Pokémon/6
|style="margin:auto"|{{Pokémon/6
|ndex=094
|ndex=094
Line 2,735:
Line 2,729: |move3type=Fire|move3=Will-O-Wisp|move3cat=Status
|move3type=Fire|move3=Will-O-Wisp|move3cat=Status
|move4type=Normal|move4=Follow Me|move4cat=Status}}
|move4type=Normal|move4=Follow Me|move4cat=Status}}
{{Party/Div|Black color light}}
|style="margin:auto"|{{Pokémon/6
|style="margin:auto"|{{Pokémon/6
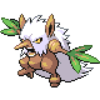
|ndex=681
|ndex=681
Pokémon League
"Wild Missingno. appeared!"
Pokémon League in {{{variable2}}}.
Map description
This area is not described by a map.
[[|Pokémon League Gym Torren
[[File:{{{leadersprite}}}|{{{leader}}}|link={{{leader}}}]][[{{{leader}}}|{{{leader}}} ]]
No specialty type
[[File:{{{badge}}} Badge.png|70px|{{{badge}}} Badge|link=Badge#{{{badge}}} Badge]][[Badge#{{{badge}}} Badge|{{{badge}}} Badge ]]
[[|Pokémon League Gym ]] - Torren
[[File:{{{leadersprite2}}}|{{{leader2}}}|link={{{leader2}}}]][[{{{leader2}}}|{{{leader2}}} ]]
Unknown-type [[File:{{{badge}}} Badge.png|70px|{{{badge}}} Badge|link=Badge#{{{badge}}} Badge]][[Badge#{{{badge}}} Badge|{{{badge}}} Badge ]]
[[|Pokémon League Gym ]] - Torren
[[File:{{{leadersprite3}}}|{{{leader3}}}|link={{{leader3}}}]][[{{{leader3}}}|{{{leader3}}} ]]
Unknown-type [[File:{{{badge}}} Badge.png|70px|{{{badge}}} Badge|link=Badge#{{{badge}}} Badge]][[Badge#{{{badge}}} Badge|{{{badge}}} Badge ]]
Torren League
Torren League
Location Interactive Map Location of Pokémon League in Torren
The Pokémon League is the building which serves as the headquarters for the Torren League. Trainers come here to challenge the powerful Elite Four in any order before eventually facing the Champion. In recent times the League has seen a massive drop in challengers due to the disappearance of the 8th Gym Leader and, thus, the 8th Gym Badge .
The Pokémon League's challenge conditions change based on what Difficulty mode the player is using. On Easy difficulty, there is no difference from normal trainer battles. On Normal difficulty, the player's Battle Style is forced to Set . On Hard difficulty, the player is restricted from using items during battle while also having the player's Battle Style forced to Set ; for the sake of fairness, the Elite Four and Champion will also be forbidden from using items in battle.
The Elite Four and Champion battles are also unique in that the levels of their Pokémon scale with the player's party. For the teams posted for each trainer, each Pokémon's level represents the minimum level at which the player fights them in battle; if the highest level in the player's party exceeds that number, then the opposing Pokémon's level will rise accordingly.
Walkthrough
First Challenge
When first challenging the Pokémon League, simply talk to the old man behind the counter after making preparations to start the challenge. The player may not leave once the challenge has started.
After defeating all four Elite Four members, the entryway to the Champion's room will open after pressing the button beneath the Giratina statue in the first room.
Once the Champion is defeated, go with Professor Sylvan to register the player's team in the Hall of Fame. The player will then learn that they next need to travel back to where they battled Mew in the Crystal Caves .
Post Elite Four
This guide lists all the things you can do after beating the Pokemon League.
Rematches
The Elite Four can be faced again at higher levels after the player has subjugated Arceus at the Throne of the Hegemon . Beyond this, the procedure for challenging the League is the same aside from the player experiencing a new Champion battle.
Structure
Superstructure
In Pokémon Insurgence, the Pokémon League is depicted as a massive pyramid with a golden bridge leading to it from Victory Road . Statues of Cresselia , Darkrai , Poké Balls and Jaern can be found on either side of the building. At the end of the bridge, the player can speak to the PikaTaxi guy to go to and from the Pokémon League.
Ground Floor
On the ground floor, the player can find a Poké Mart and a Pokémon Center in opposite corners of the room. In between these two services, the player may speak with an old man to begin their challenge. Various NPCs can be found loitering around the ground floor, of which is a Black Belt who challenges the player to complete the League challenge without letting a single Pokémon faint.
Statue
When starting their League challenge, the player should first notice a statue of Giratina located in the center of the room. Once all four members of the Elite Four have been defeated, the statue moves aside to reveal a button which allows the player to proceed and challenge the Champion.
To the left and right of the Giratina statue are rooms which open up to two additional rooms within each. From left to right, these rooms correspond to the rooms where the player battles Kayla , Eduard , Yuki , and London . These battles do not need to be completed in a particular order.
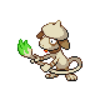
Kayla 's room is noticeably quite pink, with grass composing the border of the room and hearts greeting the player as they enter. Plants line the walkway as well as the battlefield itself.
First battle
On Easy difficulty
Reward:
Smeargle Lv. 87+
HP
Atk
Def
SpA
SpD
Spe
85
85
85
85
85
85
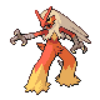
Blaziken Lv. 87+
HP
Atk
Def
SpA
SpD
Spe
85
85
85
85
85
85
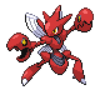
Scizor Lv. 87+
HP
Atk
Def
SpA
SpD
Spe
85
85
85
85
85
85
Espeon Lv. 87+
HP
Atk
Def
SpA
SpD
Spe
85
85
85
85
85
85
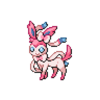
Sylveon Lv. 87+
HP
Atk
Def
SpA
SpD
Spe
85
85
85
85
85
85
Slowbro Lv. 88+
HP
Atk
Def
SpA
SpD
Spe
85
85
85
85
85
85
On Normal difficulty
Reward:
Smeargle Lv. 88+
HP
Atk
Def
SpA
SpD
Spe
85
85
85
85
85
85
Blaziken Lv. 88+
HP
Atk
Def
SpA
SpD
Spe
85
85
85
85
85
85
Scizor Lv. 89+
HP
Atk
Def
SpA
SpD
Spe
85
85
85
85
85
85
Espeon Lv. 89+
HP
Atk
Def
SpA
SpD
Spe
85
85
85
85
85
85
Sylveon Lv. 89+
HP
Atk
Def
SpA
SpD
Spe
85
85
85
85
85
85
Slowbro Lv. 90+
HP
Atk
Def
SpA
SpD
Spe
85
85
85
85
85
85
On Hard difficulty
Reward:
Smeargle Lv. 89+
HP
Atk
Def
SpA
SpD
Spe
85
85
85
85
85
85
Blaziken Lv. 89+
HP
Atk
Def
SpA
SpD
Spe
85
85
85
85
85
85
Scizor Lv. 89+
HP
Atk
Def
SpA
SpD
Spe
85
85
85
85
85
85
Espeon Lv. 90+
HP
Atk
Def
SpA
SpD
Spe
85
85
85
85
85
85
Sylveon Lv. 91+
HP
Atk
Def
SpA
SpD
Spe
85
85
85
85
85
85
Slowbro Lv. 92+
HP
Atk
Def
SpA
SpD
Spe
85
85
85
85
85
85
Rematch
On Easy difficulty
Reward:
Smeargle Lv. 102+
HP
Atk
Def
SpA
SpD
Spe
85
85
85
85
85
85
Blaziken Lv. 102+
HP
Atk
Def
SpA
SpD
Spe
85
85
85
85
85
85
Scizor Lv. 102+
HP
Atk
Def
SpA
SpD
Spe
85
85
85
85
85
85
Espeon Lv. 102+
HP
Atk
Def
SpA
SpD
Spe
85
85
85
85
85
85
Sylveon Lv. 102+
HP
Atk
Def
SpA
SpD
Spe
85
85
85
85
85
85
Slowbro Lv. 103+
HP
Atk
Def
SpA
SpD
Spe
85
85
85
85
85
85
On Normal difficulty
Reward:
Smeargle Lv. 102+
HP
Atk
Def
SpA
SpD
Spe
85
85
85
85
85
85
Blaziken Lv. 102+
HP
Atk
Def
SpA
SpD
Spe
85
85
85
85
85
85
Scizor Lv. 103+
HP
Atk
Def
SpA
SpD
Spe
85
85
85
85
85
85
Espeon Lv. 103+
HP
Atk
Def
SpA
SpD
Spe
85
85
85
85
85
85
Sylveon Lv. 103+
HP
Atk
Def
SpA
SpD
Spe
85
85
85
85
85
85
Slowbro Lv. 104+
HP
Atk
Def
SpA
SpD
Spe
85
85
85
85
85
85
On Hard difficulty
Reward:
Smeargle Lv. 104+
HP
Atk
Def
SpA
SpD
Spe
85
85
85
85
85
85
Blaziken Lv. 104+
HP
Atk
Def
SpA
SpD
Spe
85
85
85
85
85
85
Scizor Lv. 105+
HP
Atk
Def
SpA
SpD
Spe
85
85
85
85
85
85
Espeon Lv. 105+
HP
Atk
Def
SpA
SpD
Spe
85
85
85
85
85
85
Sylveon Lv. 105+
HP
Atk
Def
SpA
SpD
Spe
85
85
85
85
85
85
Slowbro Lv. 106+
HP
Atk
Def
SpA
SpD
Spe
85
85
85
85
85
85
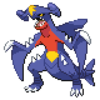
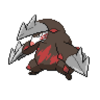
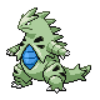
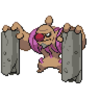
Eduard 's room is littered with rocks while sand covers the battlefield to match his Sandstorm theme.
First battle
On Easy difficulty
On Normal difficulty
Reward:
Hippowdon Lv. 88+
HP
Atk
Def
SpA
SpD
Spe
85
85
85
85
85
85
Tyranitar Lv. 88+
HP
Atk
Def
SpA
SpD
Spe
85
85
85
85
85
85
Aegislash Lv. 89+
HP
Atk
Def
SpA
SpD
Spe
85
85
85
85
85
85
Excadrill Lv. 89+
HP
Atk
Def
SpA
SpD
Spe
85
85
85
85
85
85
Rotom Lv. 89+
HP
Atk
Def
SpA
SpD
Spe
85
85
85
85
85
85
Cacturne Lv. 90+
HP
Atk
Def
SpA
SpD
Spe
85
85
85
85
85
85
On Hard difficulty
Reward:
Hippowdon Lv. 89+
HP
Atk
Def
SpA
SpD
Spe
85
85
85
85
85
85
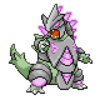
Garchomp Lv. 89+
HP
Atk
Def
SpA
SpD
Spe
85
85
85
85
85
85
Aegislash Lv. 90+
HP
Atk
Def
SpA
SpD
Spe
85
85
85
85
85
85
Excadrill Lv. 90+
HP
Atk
Def
SpA
SpD
Spe
85
85
85
85
85
85
Cacturne Lv. 92+
HP
Atk
Def
SpA
SpD
Spe
85
85
85
85
85
85
Rematch
On Easy difficulty
On Normal difficulty
Reward:
Hippowdon Lv. 102+
HP
Atk
Def
SpA
SpD
Spe
85
85
85
85
85
85
Garchomp Lv. 102+
HP
Atk
Def
SpA
SpD
Spe
85
85
85
85
85
85
Aegislash Lv. 103+
HP
Atk
Def
SpA
SpD
Spe
85
85
85
85
85
85
Excadrill Lv. 103+
HP
Atk
Def
SpA
SpD
Spe
85
85
85
85
85
85
Rotom Lv. 103+
HP
Atk
Def
SpA
SpD
Spe
85
85
85
85
85
85
Cacturne Lv. 104+
HP
Atk
Def
SpA
SpD
Spe
85
85
85
85
85
85
On Hard difficulty
Reward:
Hippowdon Lv. 104+
HP
Atk
Def
SpA
SpD
Spe
85
85
85
85
85
85
Garchomp Lv. 104+
HP
Atk
Def
SpA
SpD
Spe
85
85
85
85
85
85
Aegislash Lv. 105+
HP
Atk
Def
SpA
SpD
Spe
85
85
85
85
85
85
Excadrill Lv. 105+
HP
Atk
Def
SpA
SpD
Spe
85
85
85
85
85
85
Cacturne Lv. 106+
HP
Atk
Def
SpA
SpD
Spe
85
85
85
85
85
85
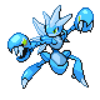
Yuki 's room has ice crystals and rocks scattered throughout, with snow forming the border of the room to match her Hail theme.
First battle
On Easy difficulty
On Normal difficulty
Reward:
Mamoswine Lv. 88+
HP
Atk
Def
SpA
SpD
Spe
85
85
85
85
85
85
Rotom Lv. 89+
HP
Atk
Def
SpA
SpD
Spe
85
85
85
85
85
85
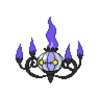
Chandelure Lv. 89+
HP
Atk
Def
SpA
SpD
Spe
85
85
85
85
85
85
Starmie Lv. 89+
HP
Atk
Def
SpA
SpD
Spe
85
85
85
85
85
85
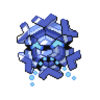
Cryogonal Lv. 90+
HP
Atk
Def
SpA
SpD
Spe
85
85
85
85
85
85
On Hard difficulty
Reward:
Mamoswine Lv. 89+
HP
Atk
Def
SpA
SpD
Spe
85
85
85
85
85
85
Rotom Lv. 89+
HP
Atk
Def
SpA
SpD
Spe
85
85
85
85
85
85
Delta Scizor Lv. 90+
HP
Atk
Def
SpA
SpD
Spe
85
85
85
85
85
85
Starmie Lv. 90+
HP
Atk
Def
SpA
SpD
Spe
85
85
85
85
85
85
Cryogonal Lv. 92+
HP
Atk
Def
SpA
SpD
Spe
85
85
85
85
85
85
Rematch
On Easy difficulty
On Normal difficulty
Reward:
Mamoswine Lv. 102+
HP
Atk
Def
SpA
SpD
Spe
85
85
85
85
85
85
Rotom Lv. 103+
HP
Atk
Def
SpA
SpD
Spe
85
85
85
85
85
85
Chandelure Lv. 103+
HP
Atk
Def
SpA
SpD
Spe
85
85
85
85
85
85
Starmie Lv. 103+
HP
Atk
Def
SpA
SpD
Spe
85
85
85
85
85
85
Cryogonal Lv. 104+
HP
Atk
Def
SpA
SpD
Spe
85
85
85
85
85
85
On Hard difficulty
Reward:
Mamoswine Lv. 104+
HP
Atk
Def
SpA
SpD
Spe
85
85
85
85
85
85
Rotom Lv. 105+
HP
Atk
Def
SpA
SpD
Spe
85
85
85
85
85
85
Delta Scizor Lv. 105+
HP
Atk
Def
SpA
SpD
Spe
85
85
85
85
85
85
Starmie Lv. 105+
HP
Atk
Def
SpA
SpD
Spe
85
85
85
85
85
85
Cryogonal Lv. 106+
HP
Atk
Def
SpA
SpD
Spe
85
85
85
85
85
85
London 's room is filled with psychedelic recurring patterns of light blue and dark blue squares to fit his Trick Room theme.
First battle
On Easy difficulty
On Normal difficulty
Reward:
Reuniclus Lv. 90+
HP
Atk
Def
SpA
SpD
Spe
85
85
85
85
85
85
Conkeldurr Lv. 88+
HP
Atk
Def
SpA
SpD
Spe
85
85
85
85
85
85
Togekiss Lv. 88+
HP
Atk
Def
SpA
SpD
Spe
85
85
85
85
85
85
Jellicent Lv. 89+
HP
Atk
Def
SpA
SpD
Spe
85
85
85
85
85
85
Scizor Lv. 89+
HP
Atk
Def
SpA
SpD
Spe
85
85
85
85
85
85
Marowak Lv. 89+
HP
Atk
Def
SpA
SpD
Spe
85
85
85
85
85
85
On Hard difficulty
Reward:
Reuniclus Lv. 92+
HP
Atk
Def
SpA
SpD
Spe
85
85
85
85
85
85
Delta Golurk Lv. 89+
HP
Atk
Def
SpA
SpD
Spe
85
85
85
85
85
85
Togekiss Lv. 89+
HP
Atk
Def
SpA
SpD
Spe
85
85
85
85
85
85
Jellicent Lv. 91+
HP
Atk
Def
SpA
SpD
Spe
85
85
85
85
85
85
Delta Aggron Lv. 90+
HP
Atk
Def
SpA
SpD
Spe
85
85
85
85
85
85
Marowak Lv. 90+
HP
Atk
Def
SpA
SpD
Spe
85
85
85
85
85
85
Rematch
On Easy difficulty
On Normal difficulty
Reward:
Reuniclus Lv. 104+
HP
Atk
Def
SpA
SpD
Spe
85
85
85
85
85
85
Conkeldurr Lv. 102+
HP
Atk
Def
SpA
SpD
Spe
85
85
85
85
85
85
Togekiss Lv. 102+
HP
Atk
Def
SpA
SpD
Spe
85
85
85
85
85
85
Jellicent Lv. 103+
HP
Atk
Def
SpA
SpD
Spe
85
85
85
85
85
85
Scizor Lv. 103+
HP
Atk
Def
SpA
SpD
Spe
85
85
85
85
85
85
Marowak Lv. 103+
HP
Atk
Def
SpA
SpD
Spe
85
85
85
85
85
85
On Hard difficulty
Reward:
Reuniclus Lv. 106+
HP
Atk
Def
SpA
SpD
Spe
85
85
85
85
85
85
Delta Golurk Lv. 105+
HP
Atk
Def
SpA
SpD
Spe
85
85
85
85
85
85
Togekiss Lv. 104+
HP
Atk
Def
SpA
SpD
Spe
85
85
85
85
85
85
Jellicent Lv. 105+
HP
Atk
Def
SpA
SpD
Spe
85
85
85
85
85
85
Delta Aggron Lv. 104+
HP
Atk
Def
SpA
SpD
Spe
85
85
85
85
85
85
Marowak Lv. 105+
HP
Atk
Def
SpA
SpD
Spe
85
85
85
85
85
85
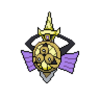
The Champion's room is covered in black and gold floor panels, statues, and more.
First battle
On Easy difficulty
On Normal difficulty
Reward:
Tyranitar Lv. 90+
HP
Atk
Def
SpA
SpD
Spe
85
85
85
85
85
85
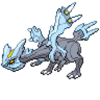
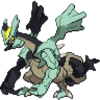
Kyurem Lv. 92+
HP
Atk
Def
SpA
SpD
Spe
85
85
85
85
85
85
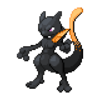
Mewtwo Lv. 92+
HP
Atk
Def
SpA
SpD
Spe
85
85
85
85
85
85
Flygon Lv. 91+
HP
Atk
Def
SpA
SpD
Spe
85
85
85
85
85
85
On Hard difficulty
Reward:
Tyranitar Lv. 91+
HP
Atk
Def
SpA
SpD
Spe
85
85
85
85
85
85
Kyurem Lv. 95+
HP
Atk
Def
SpA
SpD
Spe
85
85
85
85
85
85
Mewtwo Lv. 96+
HP
Atk
Def
SpA
SpD
Spe
85
85
85
85
85
85
Flygon Lv. 94+
HP
Atk
Def
SpA
SpD
Spe
85
85
85
85
85
85
Rematch
On Easy difficulty
Held item:
None
Spiritomb Lv. 104+
HP
Atk
Def
SpA
SpD
Spe
85
85
85
85
85
85
Held item:
None
Greninja Lv. 104+
HP
Atk
Def
SpA
SpD
Spe
85
85
85
85
85
85
Shiftry Lv. 105+
HP
Atk
Def
SpA
SpD
Spe
85
85
85
85
85
85
Held item:
None
Gengar Lv. 104+
HP
Atk
Def
SpA
SpD
Spe
85
85
85
85
85
85
Held item:
None
Aegislash Lv. 104+
HP
Atk
Def
SpA
SpD
Spe
85
85
85
85
85
85
On Normal difficulty
Spiritomb Lv. 105+
HP
Atk
Def
SpA
SpD
Spe
85
85
85
85
85
85
Greninja Lv. 106+
HP
Atk
Def
SpA
SpD
Spe
85
85
85
85
85
85
Shiftry Lv. 107+
HP
Atk
Def
SpA
SpD
Spe
85
85
85
85
85
85
Gengar Lv. 105+
HP
Atk
Def
SpA
SpD
Spe
85
85
85
85
85
85
Aegislash Lv. 106+
HP
Atk
Def
SpA
SpD
Spe
85
85
85
85
85
85
On Hard difficulty
Spiritomb Lv. 106+
HP
Atk
Def
SpA
SpD
Spe
85
85
85
85
85
85
Greninja Lv. 107+
HP
Atk
Def
SpA
SpD
Spe
85
85
85
85
85
85
Shiftry Lv. 108+
HP
Atk
Def
SpA
SpD
Spe
85
85
85
85
85
85
Gengar Lv. 106+
HP
Atk
Def
SpA
SpD
Spe
85
85
85
85
85
85
Aegislash Lv. 107+
HP
Atk
Def
SpA
SpD
Spe
85
85
85
85
85
85
Hall of Fame
After defeating the Champion, Professor Sylvan will take the player into the back room to the Hall of Fame, where the player's Poké Balls are placed onto a machine which will register them.
Items
Item
Location
Rare Candy
Right side of the League building, in a red berry bush (hidden)
TM40 Aerial Ace
Left side of the League building, can be purchased from the shady man for free
TM111 Captivate
Left side of the League building, can be purchased from the shady man for free
TM112 Permafrost
Left side of the League building, can be purchased from the shady man for
TM113 Snarl
Left side of the League building, can be purchased from the shady man for free
TM114 Corrode
Left side of the League building, can be purchased from the shady man for
HM04 Strength
Left side of the League building, can be purchased from the shady man for free
Honey
Purchased from the balding man for
If the player completes the Pokémon League challenge without having a single Pokémon faint, then the Black Belt in the Pokémon League lobby will give them a special Red Gardevoir as a reward.
If the player completes the Pokémon League challenge without having a single Pokémon faint, Moderator 1oftherocketbros in the Pokémon League lobby will award you with a special Red Lucario and special Red Machamp if you speak to him.
Pokémon
Location
Levels
Rate
Gift Pokémon
Gift
40
One
Gift
40
One
Gift
40
One


