Line 157:
Line 157: |game=XY
|game=XY
|location=Metchi Town
|location=Metchi Town
|pokemon=5}}
|pokemon=4 }}
|{{Pokémon/6
|{{Pokémon/6
|type1=Steel|type2=Ghost
|type1=Steel|type2=Ghost
Line 199:
Line 199: |move3type=Normal|move3=Heal Bell|move3cat=Status
|move3type=Normal|move3=Heal Bell|move3cat=Status
|move4type=Grass|move4=Magical Leaf|move4cat=Special}}
|move4type=Grass|move4=Magical Leaf|move4cat=Special}}
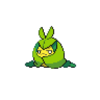
|{{Pokémon/6
|type1=Bug|type2=Grass
|ndex=541
|ability=Cholorophyll
|pokemon=Swadloon
|level=26
|move1type=Normal|move1=Protect|move1cat=Status
|move2type=Grass|move2=Razor Leaf|move2cat=Physical
|move3type=Bug|move3=String Shot|move3cat=Status
|move4type=Bug|move4=Bug Bite|move4cat=Physical}}
{{Party/Footer}}
{{Party/Footer}}
Metchi Town in {{{variable2}}}.
Map description
[[|Metchi Town Gym Torren
[[File:{{{leadersprite}}}|{{{leader}}}|link={{{leader}}}]][[{{{leader}}}|{{{leader}}} ]]
No specialty type
[[File:{{{badge}}} Badge.png|70px|{{{badge}}} Badge|link=Badge#{{{badge}}} Badge]][[Badge#{{{badge}}} Badge|{{{badge}}} Badge ]]
[[|Metchi Town Gym ]] - Torren
[[File:{{{leadersprite2}}}|{{{leader2}}}|link={{{leader2}}}]][[{{{leader2}}}|{{{leader2}}} ]]
Unknown-type [[File:{{{badge}}} Badge.png|70px|{{{badge}}} Badge|link=Badge#{{{badge}}} Badge]][[Badge#{{{badge}}} Badge|{{{badge}}} Badge ]]
[[|Metchi Town Gym ]] - Torren
[[File:{{{leadersprite3}}}|{{{leader3}}}|link={{{leader3}}}]][[{{{leader3}}}|{{{leader3}}} ]]
Unknown-type [[File:{{{badge}}} Badge.png|70px|{{{badge}}} Badge|link=Badge#{{{badge}}} Badge]][[Badge#{{{badge}}} Badge|{{{badge}}} Badge ]]
[[| League
[[File:{{{elite1sprite}}}|64px|{{{elite1}}}|link={{{elite1}}}]]Elite Four [[{{{elite1}}}|{{{elite1}}} ]]
[[File:{{{elite2sprite}}}|64px|{{{elite2}}}|link={{{elite2}}}]]Elite Four [[{{{elite2}}}|{{{elite2}}} ]]
[[File:{{{elite3sprite}}}|64px|{{{elite3}}}|link={{{elite3}}}]]Elite Four [[{{{elite3}}}|{{{elite3}}} ]]
[[File:{{{elite4sprite}}}|64px|{{{elite4}}}|link={{{elite4}}}]]Elite Four [[{{{elite4}}}|{{{elite4}}} ]]
[[File:{{{championsprite}}}|{{{champion}}}|link={{{champion}}}]]Champion [[{{{champion}}}|{{{champion}}} ]]
[[| League
[[File:{{{elite1sprite2}}}|64px|{{{elite12}}}|link={{{elite12}}}]]Elite Four [[{{{elite12}}}|{{{elite12}}} ]]
[[File:{{{elite2sprite2}}}|64px|{{{elite22}}}|link={{{elite22}}}]]Elite Four [[{{{elite22}}}|{{{elite22}}} ]]
[[File:{{{elite3sprite2}}}|64px|{{{elite32}}}|link={{{elite32}}}]]Elite Four [[{{{elite32}}}|{{{elite32}}} ]]
[[File:{{{elite4sprite2}}}|64px|{{{elite42}}}|link={{{elite42}}}]]Elite Four [[{{{elite42}}}|{{{elite42}}} ]]
[[File:{{{championsprite2}}}|{{{champion2}}}|link={{{champion2}}}]]Champion [[{{{champion2}}}|{{{champion2}}} ]]
Location Interactive Map Location of Metchi Town in Torren
Metchi Town is a small town connected to Route 3 and Route 4 that is divided into two halves by a river. This is the location where the player will first be able to access their Secret Base . The Pokémon Daycare is also located here, allowing the player to breed Pokémon.
Walkthrough
As the player reaches the end of the bridge connecting the two halves of town, they will be challenged to a battle by Nora .
After defeating Nora and exploring the rest of town as desired, exit Metchi Town by Surfing south along the river.
Places of interest
Secret Base
Main article: Secret Base In the eastern part of Metchi Town, the player will finally be able to purchase their very own Secret Base from a man for
Daycare Center
Main article: Daycare Center In the southwestern corner of Metchi Town, the player will encounter the Daycare couple. The player will be able to leave their Pokémon here for some easy leveling as they continue to travel or they will be able to start breeding stronger Pokémon to assist them later in the game.
Perfection Laboratory
Main article: Perfection Laboratory A long abandoned laboratory formerly used by Perfection for research is located by following the river north past the rocks. Opening the building requires the use of the Laboratory Key .
Delta Ditto Quest
The last of the Delta Ditto quest is completed here by speaking with the Daycare Lady and then gaining access to the fenced off area behind her. To begin this quest, visit the Ancient Tower .
Items
Pokémon are encountered in any portion of the river accessible to the player.
A man in the house northeast of the Pokémon Center will sell a Marill egg to the player for
Delta Ditto can be encountered at the end of the Delta Ditto Quest, originating from the Ancient Tower .
Interacting with any TVs in the town's houses has a chance of spawning a Rotom .
Pokémon
Location
Levels
Rate
Surfing
14-19
60%
14-16
34%
14-16
6%
Fishing
16-19
15%
16-19
15%
16-19
70%
15-19
20%
15-19
20%
17-18
60%
15-17
1%
15-18
9.5%
15-18
9.5%
16-19
80%
Gift Pokémon
1
Purchase for
Special Pokémon
Interact
Highest level Pokémon, minimum of 10
Infinite
Interact
30
One
Trainers
On Easy difficulty
Eevee :
Delta Bulbasaur :
Delta Charmander :
Delta Squirtle :
On Normal difficulty
Eevee :
Delta Bulbasaur :
Delta Charmander :
Delta Squirtle :
On Hard difficulty
Eevee :
Reward:
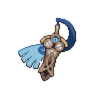
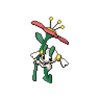
Honedge Lv. 28
HP
Atk
Def
SpA
SpD
Spe
85
85
85
85
85
85
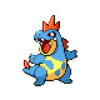
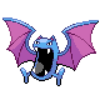
Golbat Lv. 28
HP
Atk
Def
SpA
SpD
Spe
85
85
85
85
85
85
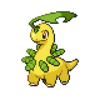
Swadloon Lv. 28
HP
Atk
Def
SpA
SpD
Spe
85
85
85
85
85
85
Floette Lv. 28
HP
Atk
Def
SpA
SpD
Spe
85
85
85
85
85
85
Trapinch Lv. 28
HP
Atk
Def
SpA
SpD
Spe
85
85
85
85
85
85
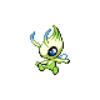
Celebi Lv. 28
HP
Atk
Def
SpA
SpD
Spe
85
85
85
85
85
85
Delta Bulbasaur :
Reward:
Honedge Lv. 28
HP
Atk
Def
SpA
SpD
Spe
85
85
85
85
85
85
Golbat Lv. 28
HP
Atk
Def
SpA
SpD
Spe
85
85
85
85
85
85
Swadloon Lv. 28
HP
Atk
Def
SpA
SpD
Spe
85
85
85
85
85
85
Floette Lv. 28
HP
Atk
Def
SpA
SpD
Spe
85
85
85
85
85
85
Bayleef Lv. 28
HP
Atk
Def
SpA
SpD
Spe
85
85
85
85
85
85
Celebi Lv. 28
HP
Atk
Def
SpA
SpD
Spe
85
85
85
85
85
85
Delta Charmander :
Reward:
Honedge Lv. 28
HP
Atk
Def
SpA
SpD
Spe
85
85
85
85
85
85
Golbat Lv. 28
HP
Atk
Def
SpA
SpD
Spe
85
85
85
85
85
85
Swadloon Lv. 28
HP
Atk
Def
SpA
SpD
Spe
85
85
85
85
85
85
Floette Lv. 28
HP
Atk
Def
SpA
SpD
Spe
85
85
85
85
85
85
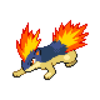
Quilava Lv. 28
HP
Atk
Def
SpA
SpD
Spe
85
85
85
85
85
85
Celebi Lv. 28
HP
Atk
Def
SpA
SpD
Spe
85
85
85
85
85
85
Delta Squirtle :
Reward:
Honedge Lv. 28
HP
Atk
Def
SpA
SpD
Spe
85
85
85
85
85
85
Golbat Lv. 28
HP
Atk
Def
SpA
SpD
Spe
85
85
85
85
85
85
Swadloon Lv. 28
HP
Atk
Def
SpA
SpD
Spe
85
85
85
85
85
85
Floette Lv. 28
HP
Atk
Def
SpA
SpD
Spe
85
85
85
85
85
85
Croconaw Lv. 28
HP
Atk
Def
SpA
SpD
Spe
85
85
85
85
85
85
Celebi Lv. 28
HP
Atk
Def
SpA
SpD
Spe
85
85
85
85
85
85


 If the player chose Eevee:


 If the player chose Delta Bulbasaur:
 If the player chose Delta Charmander:
 If the player chose Delta Squirtle: