Void Gauntlet: Difference between revisions
(Some slight overall edit - needs fixing later) |
m (→Pokémon Village: fixed snore ball link) |
||
| (36 intermediate revisions by 11 users not shown) | |||
| Line 10: | Line 10: | ||
|mapsize=350px | |mapsize=350px | ||
|image_size = 350px}} | |image_size = 350px}} | ||
'''Void Gauntlet''' is a distorted space, | The '''Void Gauntlet''' is a distorted space that exists between the dimensions of the real world and the {{BLink|Distortion World}}. It does not exist in any particular region but appears to be directly accessed from the [[Crystal Caves]], making it a location in the [[Torren]] region for all intents and purposes within the game. | ||
Because the Void Gauntlet permeates multiple different areas across different worlds and dimensions, the player is forced to traverse through multiple locations found both in the core series games as well as a few locations from [[zowiki:|Pokémon Zeta and Omicron]]. These locations include [[bulbapedia:Pokémon Mansion (Kanto)|Pokémon Mansion]] and {{BLink|Pokémon Tower}} from the {{BLink|Kanto Region}}, [[zowiki:Naragex_Forest|Naragex Forest]] and the [[zowiki:Sigil_Hall#The_Hall_of_Legends|Hall of Legends]] from the | |||
[[zowiki:Vesryn_Region|Vesryn Region]], {{BLink|Cave of Origin}} from the {{BLink|Hoenn Region}}, {{BLink|Pokémon Village}} and [[bulbapedia:Unknown Dungeon (Kalos)|Unknown Dungeon]] from the {{BLink|Kalos Region}}, {{BLink|Citadark Isle}} from the {{BLink|Orre Region}}, {{BLink|Giant Chasm}} from the {{BLink|Unova Region}}, {{BLink|Spear Pillar}} from the {{BLink|Sinnoh Region}}, and finally the [[Throne of the Hegemon]]. | |||
==Walkthrough== | ==Walkthrough== | ||
===Rescuing Nora=== | |||
* After entering this place through the [[Hyperspace Hole]] in the [[Crystal Caves]], exit through the cave opening and begin exploring the [[bulbapedia:Pokémon Mansion (Kanto)|Pokémon Mansion]]. | |||
* Use [[Heart Swap]] to access a switch in the statue located in the upper left corner of the map to bypass the gate in Pokémon Mansion before taking the next portal. | |||
* Follow the path through [[zowiki:Naragex_Forest|Naragex Forest]] to reach the next portal; ignore the {{p|Manaphy}} statue in this area. | |||
* Travel north in the {{BLink|Cave of Origin}} after defeating the [[Damned Cult|Mysterious Grunt]] to take a portal to {{BLink|Pokémon Village}}. | |||
* In Pokémon Village, head west, [[surf]] north and then east, and then enter the cave to the [[bulbapedia:Unknown Dungeon (Kalos)|Unknown Dungeon]] to enter the next portal. | |||
* Head around the gravestones in {{BLink|Pokémon Tower}} to enter the portal on the second floor, leading to {{BLink|Citadark Isle}}. | |||
* Head counterclockwise around the lava in Citadark Isle to arrive at the portal leading into the {{BLink|Giant Chasm}}. | |||
* Travel south through Giant Chasm to find the portal leading to {{BLink|Spear Pillar}}. | |||
* Go north to reach the portal to the [[zowiki:Sigil_Hall#The_Hall_of_Legends|Hall of Legends]]. | |||
* Maneuver up the stairs and then traverse north to access the final portal, leading to the [[Throne of the Hegemon]] where the player has to defeat [[Nyx]] and [[Giratina]]. | |||
===Pursuing Reukra=== | |||
* Travel through the Void Gauntlet as normal while experiencing no differences in traveling aside from unavoidable Pokémon battles in the form of {{BLink|Azure Flute}} defense systems. | |||
* Head into the Throne of the Hegemon to find Reukra. | |||
==Items== | ==Items== | ||
'''Naragex Forest''' | ===Starting area=== | ||
{{ | {{Itlisth|space}} | ||
{{Itemlist|Full Restore|Southeast of the portal from the [[Crystal Caves]]|display={{BLink|Full Restore}}}} | |||
{{Itemlist|Rare Candy|In a rock pillar southwest of the portal from the [[Crystal Caves]] ''(hidden)''|display={{BLink|Rare Candy}}}} | |||
{{Itlistfoot|space}} | |||
===Pokémon Mansion=== | |||
{{Itlisth|ruins}} | |||
{{Itemlist|Wiki Berry|Northwest of the entrance from the starting area of the Void Gauntlet|display={{BLink|Wiki Berry}}}} | |||
{{Itemlist|Ultra Ball|On a table in the northwestern corner (requires [[Heart Swap]])|display={{BLink|Ultra Ball}}}} | |||
{{Itemlist|Genius Wing|Southwest of the gate|display={{BLink|Genius Wing}}}} | |||
{{Itemlist|Rare Candy|Southwest of the gate|display={{BLink|Rare Candy}}}} | |||
{{Itlistfoot|ruins}} | |||
===Naragex Forest=== | |||
{{Itlisth|forest}} | |||
{{Itemlist|Paralyze Heal|Southeast of the entrance to the Pokémon mansion|display={{BLink|Paralyze Heal}}}} | |||
{{Itemlist|Leppa Berry|In the fourth tree from the entrance to the Pokémon Mansion ''(hidden)''|display={{BLink|Leppa Berry}}}} | |||
{{Itemlist|Ancient Ball|In a tree southwest from the house ''(hidden)''}} | {{Itemlist|Ancient Ball|In a tree southwest from the house ''(hidden)''}} | ||
{{Itlistfoot| | {{Itemlist|Great Ball|In front of the house|display={{BLink|Great Ball}}}} | ||
{{Itemlist|Ether|Hidden behind the trees south of the portal to the Cave of Origin|display={{BLink|Ether}}}} | |||
{{Itlistfoot|forest}} | |||
===Terminus Cave=== | |||
{{Itlisth|cave}} | |||
{{Itemlist|Potion|Southwest leg of the cave, in a patch of flowers|display={{BLink|Potion}}}} | |||
{{Itemlist|Max Revive|Northwest leg of the cave, in a patch of flowers|display={{BLink|Max Revive}}}} | |||
{{Itemlist|Heavy Ball|Southeast leg of the cave, in a patch of flowers|display={{BLink|Heavy Ball}}}} | |||
{{Itemlist|Big Nugget|Northeast leg of the cave, in a patch of flowers ''(hidden)''|display={{BLink|Big Nugget}}}} | |||
{{Itlistfoot|cave}} | |||
===Cave of Origin=== | |||
{{Itlisth|cave}} | {{Itlisth|cave}} | ||
{{Itemlist|Mysterious Scroll|Reward for completing the tile puzzle (requires [Rock Climb]])}} | {{Itemlist|Mysterious Scroll|Reward for completing the {{p|Meloetta}} tile puzzle (requires [[Rock Climb]])}} | ||
{{Itlistfoot|cave}} | {{Itlistfoot|cave}} | ||
===Pokémon Village=== | |||
{{Itlisth|land}} | |||
{{Itemlist|Hyper Potion|Directly southeast of the entrance to the Unknown Dungeon|display={{BLink|Hyper Potion}}}} | |||
{{Itemlist|Snore Ball|Southwest of the portal to the Cave of Origin}} | |||
{{Itemlist|poisontm|West of the portal to the Cave of Origin |display=[[bulbapedia:Toxic (move)|TM06 Toxic]]}} | |||
{{Itemlist|Pixie Plate|Southwest of the waterfall|display={{BLink|Pixie Plate}}}} | |||
{{Itemlist|Chatotite|Above the waterfall (requires [[Waterfall]])|display={{DL|Mega Stone|Chatotite}}}} | |||
{{Itlistfoot|land}} | |||
===Pokémon Tower=== | |||
{{Itlisth|building}} | |||
{{Itemlist|Choice Scarf|1F; northeast of the entrance to the Unknown Dungeon|display={{BLink|Choice Scarf}}}} | |||
{{Itemlist|Eviolite|2F; southwest of the stairs leading down to the first floor|display={{BLink|Eviolite}}}} | |||
{{Itlistfoot|building}} | |||
===Citadark Isle=== | |||
{{Itlisth|volcano}} | |||
{{Itemlist|Timer Ball|Northwestern corner of the area|display={{BLink|Timer Ball}}}} | |||
{{Itlistfoot|volcano}} | |||
===Giant Chasm=== | |||
{{Itlisth|land}} | {{Itlisth|land}} | ||
{{Itemlist|Max Potion|Left of the portal to Citadark Isle|display = {{BLink|Max Potion}}}} | |||
{{Itemlist|Super Repel|Southeastern corner of the area|display = {{BLink|Super Repel}}}} | |||
{{Itemlist|Full Heal|Northwest of the portal to Spear Pillar|display = {{BLink|Full Heal}}}} | |||
{{Itemlist|dragontm|Northwest of the portal to Spear Pillar|display = [[bulbapedia:Dragon Claw (move)|TM02 Dragon Claw]]}} | |||
{{Itemlist|Rare Candy|In a big rock left of the DNA Splicers ''(hidden)''|display = {{BLink|Rare Candy}}}} | {{Itemlist|Rare Candy|In a big rock left of the DNA Splicers ''(hidden)''|display = {{BLink|Rare Candy}}}} | ||
{{Itemlist|DNA Splicers|Middle of the area (requires [[Rock Climb]])|display = {{BLink|DNA Splicers}}}} | {{Itemlist|DNA Splicers|Middle of the area (requires [[Rock Climb]])|display = {{BLink|DNA Splicers}}}} | ||
{{Itlistfoot|land}} | {{Itlistfoot|land}} | ||
===Spear Pillar=== | |||
{{Itlisth|space}} | {{Itlisth|space}} | ||
{{Itemlist| | {{Itemlist|Hard Stone|Right part of the area behind a wall and a pillar|display = {{BLink|Hard Stone}}}} | ||
{{Itemlist| | {{Itemlist|Meganiumite|Behind the wall in the northwestern corner|display={{DL|Mega Stone|Meganiumite}}}} | ||
{{Itlistfoot|space}} | {{Itlistfoot|space}} | ||
==Pokémon== | ==Pokémon== | ||
{{p|Moltres}} is found using the [[Relic Song]] within | {{p|Moltres}} is found by using the [[Relic Song]] on the northern wall within Citadark Isle. | ||
{{p|Dialga}} is at the end area of the Spear Pillar | {{p|Dialga}} is found at the end area of the Spear Pillar by using [[Rock Climb]] after the player clears the [[Elite Four]] rematches. | ||
{{p|Palkia}} is | {{p|Palkia}} is found towards the end of the Hall of Legends after the player clears the [[Elite Four]] rematches. | ||
{{p| | {{p|Zygarde}} is found in the middle of Terminus Cave after the player defeats or captures Zygarde at the [[Dragon Ruins]]. | ||
{{ | ===Starting Area=== | ||
{{Catch/header|space|2}} | |||
{{Catch/entry6|028|Sandslash|yes|yes|Cave|type1=Ground|67-72|all=34%}} | |||
{{Catch/entry6|208|Steelix|yes|yes|Cave|type1=Steel|type2=Ground|67-72|all=16%}} | |||
{{Catch/entry6|232|Donphan|yes|yes|Cave|type1=Ground|67-72|all=34%}} | |||
{{Catch/entry6|464|Rhyperior|yes|yes|Cave|type1=Ground|type2=Rock|67-72|all=16%}} | |||
{{Catch/footer|space}} | |||
===Pokémon Mansion=== | |||
{{Catch/header|ruins|2}} | |||
{{Catch/entry6|019|Rattata|yes|yes|Cave|type1=Normal|26-28|all=15%}} | |||
{{Catch/entry6|020|Raticate|yes|yes|Cave|type1=Normal|32-36|all=30%}} | |||
{{Catch/entry6|058|Growlithe|yes|yes|Cave|type1=Fire|30-32|all=15%}} | |||
{{Catch/entry6|088|Grimer|yes|yes|Cave|type1=Poison|28|all=5%}} | |||
{{Catch/entry6|109|Koffing|yes|yes|Cave|type1=Poison|28-30|all=30%}} | |||
{{Catch/entry6|110|Weezing|yes|yes|Cave|type1=Poison|32|all=5%}} | |||
{{Catch/footer|ruins}} | |||
===Naragex Forest=== | |||
{{Catch/header|forest|2}} | |||
{{Catch/entry6|012|Butterfree|yes|yes|Grass|type1=Bug|type2=Flying|10-15|all=1%}} | |||
{{Catch/entry6|015|Beedrill|yes|yes|Grass|type1=Bug|type2=Poison|10-15|all=1%}} | |||
{{Catch/entry6|046|Paras|yes|yes|Grass|type1=Bug|type2=Grass|4-5|all=20%}} | |||
{{Catch/entry6|163|Hoothoot|yes|yes|Grass|type1=Normal|type2=Flying|4-5|all=10%}} | |||
{{Catch/entry6|165|Ledyba|yes|yes|Grass|type1=Bug|type2=Flying|4-5|all=8%}} | |||
{{Catch/entry6|204|Pineco|yes|yes|Grass|type1=Bug|4-5|all=10%}} | |||
{{Catch/entry6|285|Shroomish|yes|yes|Grass|type1=Grass|4-5|all=20%}} | |||
{{Catch/entry6|401|Kricketot|yes|yes|Grass|type1=Bug|4-5|all=10%}} | |||
{{Catch/entry6|548|Petilil|yes|yes|Grass|type1=Grass|4-5|all=20%}} | |||
{{Catch/footer|forest}} | |||
===Cave of Origin=== | |||
{{Catch/header|cave|2}} | |||
{{Catch/entry6|041|Zubat|yes|yes|Cave|type1=Poison|type2=Flying|28-35|all=90%}} | |||
{{Catch/entry6|042|Golbat|yes|yes|Cave|type1=Poison|type2=Flying|33-36|all=10%}} | |||
{{Catch/footer|cave}} | |||
===Pokémon Village=== | |||
Despite the grass patches and the river, there are no wild Pokémon obtainable in the Pokémon Village. | |||
===Pokémon Tower=== | |||
{{Catch/header|building|2}} | |||
{{Catch/entry6|092|Gastly|yes|yes|Cave|type1=Ghost|type2=Poison|13-19|all=90%}} | |||
{{Catch/entry6|093|Haunter|yes|yes|Cave|type1=Ghost|type2=Poison|20|all=1%}} | |||
{{Catch/entry6|104|Cubone|yes|yes|Cave|type1=Ground|15-17|all=9%}} | |||
{{Catch/footer|building}} | |||
===Citadark Isle=== | |||
{{Catch/header| | {{Catch/header|volcano|2}} | ||
{{catch/div|cave|Special Pokémon}} | {{catch/div|cave|Special Pokémon}} | ||
{{Catch/entry6|146|Moltres|yes|yes|Special|type1=Fire|type2=Flying|100|all=One}} | {{Catch/entry6|146|Moltres|yes|yes|Special|type1=Fire|type2=Flying|100|all=One}} | ||
{{Catch/footer| | {{Catch/footer|volcano}} | ||
===Spear Pillar=== | |||
{{Catch/header| | {{Catch/header|space|2}} | ||
{{catch/div|mountain|Special Pokémon}} | {{catch/div|mountain|Special Pokémon}} | ||
{{Catch/entry6|483|Dialga|yes|yes|Special|type1=Steel|type2=Dragon|110|all=One}} | {{Catch/entry6|483|Dialga|yes|yes|Special|type1=Steel|type2=Dragon|110|all=One}} | ||
{{Catch/footer| | {{Catch/footer|space}} | ||
===Terminus Cave=== | |||
{{Catch/header|cave|2}} | |||
{{Catch/entry6|028|Sandslash|yes|yes|Cave|type1=Ground|44-48|all=20%}} | |||
{{Catch/entry6|075|Graveler|yes|yes|Cave|type1=Rock|type2=Ground|44-48|all=20%}} | |||
{{Catch/entry6|247|Pupitar|yes|yes|Cave|type1=Rock|type2=Ground|44-48|all=10%}} | |||
{{Catch/entry6|305|Lairon|yes|yes|Cave|type1=Steel|type2=Rock|44-48|all=10%}} | |||
{{Catch/entry6|632|Durant|yes|yes|Cave|type1=Bug|type2=Steel|44-48|all=40%}} | |||
{{catch/div|cave|Special Pokémon}} | |||
{{Catch/entry6|718|Zygarde|yes|yes|Special|type1=Dragon|type2=Ground|50|all=One}} | |||
{{Catch/footer|cave}} | |||
===Hall of Legends=== | |||
{{Catch/header|cave}} | {{Catch/header|cave|2}} | ||
{{catch/div|cave|Special Pokémon}} | {{catch/div|cave|Special Pokémon}} | ||
{{Catch/entry6|484|Palkia|yes|yes|Special|type1=Water|type2=Dragon|110|all=One}} | {{Catch/entry6|484|Palkia|yes|yes|Special|type1=Water|type2=Dragon|110|all=One}} | ||
{{Catch/footer|cave}} | {{Catch/footer|cave}} | ||
==Trainers== | |||
{{ | ===Rescuing Nora=== | ||
{{ | {{Trainerheader|space}} | ||
{{ | {{Trainerentry|Mysterious Grunt.png{{!}}150px|Mysterious Grunt||8000|2|563|Cofagrigus||80|None|442|Spiritomb||80|None}} | ||
{{ | {{trainerdiv|space}} | ||
{{ | {{Trainerentry|Mysterious Grunt.png{{!}}150px|Mysterious Grunt||8000|2|101|Electrode||80|None|110|Weezing||80|None}} | ||
{{trainerdiv|space}} | |||
{{Trainerentry|Mysterious Grunt.png{{!}}150px|Mysterious Grunt||8000|2|020|Raticate||80|None|020|Raticate||80|None}} | |||
{{trainerdiv|space}} | |||
{{Trainerentry|Mysterious Grunt.png{{!}}150px|Mysterious Grunt||8100|1|302|Sableye||81|None}} | |||
{{trainerdiv|space}} | |||
{{Trainerentry|Mysterious Grunt.png{{!}}150px|Mysterious Grunt||8000|2|040|Wigglytuff||80|None|576|Gothitelle||80|None}} | |||
{{trainerdiv|space}} | |||
{{Trainerentry|Mysterious Grunt.png{{!}}150px|Mysterious Grunt||8000|2|571|Zoroark||80|None|591|Amoonguss||80|None}} | |||
{{trainerdiv|space}} | |||
{{Trainerentry|Mysterious Grunt.png{{!}}150px|Mysterious Grunt||8000|2|132|Ditto||80|None|164|Noctowl||80|None}} | |||
{{trainerdiv|space}} | |||
{{Trainerentry|Mysterious Grunt.png{{!}}150px|Mysterious Grunt||8000|2|094|Gengar||80|None|094|Gengar||80|None}} | |||
{{trainerdiv|space}} | |||
{{Trainerentry|Mysterious Grunt.png{{!}}150px|Mysterious Grunt||8000|3|342|Crawdaunt||79|None|279|Pelipper||79|None|226|Mantine||80|None}} | |||
{{trainerdiv|space}} | |||
{{Trainerentry|Mysterious Grunt.png{{!}}150px|Mysterious Grunt||8000|3|213|Shuckle||79|None|242|Blissey||79|None|110|Weezing||80|None}} | |||
{{trainerdiv|space}} | |||
{{Trainerentry|Mysterious Grunt.png{{!}}150px|Mysterious Grunt||8000|2|110|Weezing||80|None|089|Muk||80|None}} | |||
{{Trainerfooter|space|6}} | |||
===Pursuing Reukra=== | |||
{{Party/Single | |||
|color={{White color light}} | |||
|headcolor={{White color}} | |||
|bordercolor={{White color dark}} | |||
|sprite=000.png | |||
|size=80px | |||
|prize={{pdollar}}9500 | |||
|class=AZURE FLUTE EMERGENCY DEFENSE SYSTEM | |||
|classlink=bulbapedia:Azure Flute | |||
|game=XY | |||
|location=Void Gauntlet | |||
|pokemon=1}} | |||
|{{Pokémon/6 | |||
|type1=Dragon | |||
|type2=Flying | |||
|ndex=373 | |||
|ability=Intimidate | |||
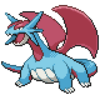
|pokemon=Salamence | |||
|level=95 | |||
|held=Salamencite | |||
|move1type=Normal|move1=Double-Edge|move1cat=Physical | |||
|move2type=Dragon|move2=Dragon Dance|move2cat=Status | |||
|move3type=Normal|move3=Refresh|move3cat=Status | |||
|move4type=Flying|move4=Roost|move4cat=Status}} | |||
{{Party/Footer}} | |||
<br> | |||
{{Party/Single | |||
|color={{White color light}} | |||
|headcolor={{White color}} | |||
|bordercolor={{White color dark}} | |||
|sprite=000.png | |||
|size=80px | |||
|prize={{pdollar}}9500 | |||
|class=AZURE FLUTE EMERGENCY DEFENSE SYSTEM | |||
|classlink=bulbapedia:Azure Flute | |||
|game=XY | |||
|location=Void Gauntlet | |||
|pokemon=1}} | |||
|{{Pokémon/6 | |||
|type1=Dragon | |||
|ndex=706 | |||
|ability=Sap Sipper | |||
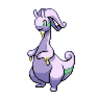
|pokemon=Goodra | |||
|level=95 | |||
|held=Assault Vest | |||
|move1type=Fire|move1=Fire Blast|move1cat=Special | |||
|move2type=Dragon|move2=Draco Meteor|move2cat=Special | |||
|move3type=Ground|move3=Earthquake|move3cat=Physical | |||
|move4type=Grass|move4=Power Whip|move4cat=Physical}} | |||
{{Party/Footer}} | |||
<br> | |||
{{Party/Single | |||
|color={{White color light}} | |||
|headcolor={{White color}} | |||
|bordercolor={{White color dark}} | |||
|sprite=000.png | |||
|size=80px | |||
|prize={{pdollar}}9500 | |||
|class=AZURE FLUTE EMERGENCY DEFENSE SYSTEM | |||
|classlink=bulbapedia:Azure Flute | |||
|game=XY | |||
|location=Void Gauntlet | |||
|pokemon=1}} | |||
|{{Pokémon/6 | |||
|type1=Psychic | |||
|ndex=576 | |||
|ability=Shadow Tag | |||
|pokemon=Gothitelle | |||
|level=95 | |||
|held=Gothitite | |||
|move1type=Dark|move1=Dark Pulse|move1cat=Special | |||
|move2type=Psychic|move2=Calm Mind|move2cat=Status | |||
|move3type=Psychic|move3=Psyshock|move3cat=Special | |||
|move4type=Dark|move4=Dark Matter|move4cat=Special}} | |||
{{Party/Footer}} | |||
<br> | |||
{{Party/Tag | |||
|color={{white color light}} | |||
|bordercolor={{white color}} | |||
|headcolor={{white color}} | |||
|color1={{white color light}} | |||
|bordercolor1={{white color}} | |||
|headcolor1={{white color}} | |||
|color2={{white color light}} | |||
|bordercolor2={{white color}} | |||
|headcolor2={{white color}} | |||
|game=Insurgence | |||
|class=AZURE FLUTE EMERGENCY DEFENSE SYSTEM | |||
|classlink=bulbapedia:Azure Flute | |||
|sprite=000.png | |||
|class2=AZURE FLUTE EMERGENCY DEFENSE SYSTEM | |||
|classlink2=bulbapedia:Azure Flute | |||
|sprite2=000.png | |||
|location=Void Gauntlet | |||
|prize={{pdollar}}9500 | |||
|pokemon1=1 | |||
|pokemon2=1}} | |||
|style="margin:auto"|{{Pokémon/6 | |||
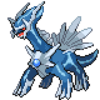
|ndex=483 | |||
|pokemon=Dialga | |||
|level=95 | |||
|gender= | |||
|type1=Steel | |||
|type2=Dragon | |||
|held=Adamant Orb | |||
|ability=Pressure | |||
|move1=Draco Meteor|move1type=Dragon|move1cat=Special | |||
|move2=Fire Blast|move2type=Fire|move2cat=Special | |||
|move3=Flash Cannon|move3type=Steel|move3cat=Special | |||
|move4=Thunder|move4type=Electric|move4cat=Special}} | |||
|style="margin:auto"|{{Pokémon/6 | |||
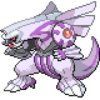
|ndex=484 | |||
|pokemon=Palkia | |||
|level=95 | |||
|gender= | |||
|type1=Water | |||
|type2=Dragon | |||
|held=Lustrous Orb | |||
|ability=Pressure | |||
|move1=Spacial Rend|move1type=Dragon|move1cat=Special | |||
|move2=Hydro Pump|move2type=Water|move2cat=Special | |||
|move3=Fire Blast|move3type=Fire|move3cat=Special | |||
|move4=Thunder Wave|move4type=Electric|move4cat=Status}} | |||
{{Party/Footer}} | |||
==Trivia== | |||
* In addition to the encounters for most areas matching those found in the games that they are derived from, the [[Damned Cult|Mysterious Grunt]]s all use Pokémon that were either used by trainers or were found in the wild in these areas in the aforementioned games. | |||
*Despite the fact that Insurgence happens after the destruction of Cinnabar Island, one of the locations in the Void Gauntlet is the Pokemon Mansion, which would have been destroyed. This either indicates that the player's journey through this area is independent of all timelines associated with the core series plotlines or that the player's journey takes place in parallel universes where certain events did not occur. | |||
{{Torren}} | {{Torren}} | ||
[[Category:Torren]] | [[Category:Torren]] | ||
Latest revision as of 07:36, 17 September 2020
| |||
| |||
| Location: | End of Crystal Caves | ||
|---|---|---|---|
| Region: | Torren | ||
Error: Image is invalid or non-existent. Interactive Map Location of Void Gauntlet in Torren. | |||
| Locations | |||


The Void Gauntlet is a distorted space that exists between the dimensions of the real world and the Distortion World. It does not exist in any particular region but appears to be directly accessed from the Crystal Caves, making it a location in the Torren region for all intents and purposes within the game.
Because the Void Gauntlet permeates multiple different areas across different worlds and dimensions, the player is forced to traverse through multiple locations found both in the core series games as well as a few locations from Pokémon Zeta and Omicron. These locations include Pokémon Mansion and Pokémon Tower from the Kanto Region, Naragex Forest and the Hall of Legends from the Vesryn Region, Cave of Origin from the Hoenn Region, Pokémon Village and Unknown Dungeon from the Kalos Region, Citadark Isle from the Orre Region, Giant Chasm from the Unova Region, Spear Pillar from the Sinnoh Region, and finally the Throne of the Hegemon.
Walkthrough
Rescuing Nora
- After entering this place through the Hyperspace Hole in the Crystal Caves, exit through the cave opening and begin exploring the Pokémon Mansion.
- Use Heart Swap to access a switch in the statue located in the upper left corner of the map to bypass the gate in Pokémon Mansion before taking the next portal.
- Follow the path through Naragex Forest to reach the next portal; ignore the Manaphy statue in this area.
- Travel north in the Cave of Origin after defeating the Mysterious Grunt to take a portal to Pokémon Village.
- In Pokémon Village, head west, surf north and then east, and then enter the cave to the Unknown Dungeon to enter the next portal.
- Head around the gravestones in Pokémon Tower to enter the portal on the second floor, leading to Citadark Isle.
- Head counterclockwise around the lava in Citadark Isle to arrive at the portal leading into the Giant Chasm.
- Travel south through Giant Chasm to find the portal leading to Spear Pillar.
- Go north to reach the portal to the Hall of Legends.
- Maneuver up the stairs and then traverse north to access the final portal, leading to the Throne of the Hegemon where the player has to defeat Nyx and Giratina.
Pursuing Reukra
- Travel through the Void Gauntlet as normal while experiencing no differences in traveling aside from unavoidable Pokémon battles in the form of Azure Flute defense systems.
- Head into the Throne of the Hegemon to find Reukra.
Items
Starting area
| Item | Location | ||
|---|---|---|---|
| Full Restore | Southeast of the portal from the Crystal Caves | ||
| Rare Candy | In a rock pillar southwest of the portal from the Crystal Caves (hidden) | ||
Pokémon Mansion
| Item | Location | ||
|---|---|---|---|
| Wiki Berry | Northwest of the entrance from the starting area of the Void Gauntlet | ||
| Ultra Ball | On a table in the northwestern corner (requires Heart Swap) | ||
| Genius Wing | Southwest of the gate | ||
| Rare Candy | Southwest of the gate | ||
Naragex Forest
| Item | Location | ||
|---|---|---|---|
| Paralyze Heal | Southeast of the entrance to the Pokémon mansion | ||
| Leppa Berry | In the fourth tree from the entrance to the Pokémon Mansion (hidden) | ||
| Ancient Ball | In a tree southwest from the house (hidden) | ||
| Great Ball | In front of the house | ||
| Ether | Hidden behind the trees south of the portal to the Cave of Origin | ||
Terminus Cave
| Item | Location | ||
|---|---|---|---|
| Potion | Southwest leg of the cave, in a patch of flowers | ||
| Max Revive | Northwest leg of the cave, in a patch of flowers | ||
| Heavy Ball | Southeast leg of the cave, in a patch of flowers | ||
| Big Nugget | Northeast leg of the cave, in a patch of flowers (hidden) | ||
Cave of Origin
| Item | Location | ||
|---|---|---|---|
| Mysterious Scroll | Reward for completing the Meloetta tile puzzle (requires Rock Climb) | ||
Pokémon Village
| Item | Location | ||
|---|---|---|---|
| Hyper Potion | Directly southeast of the entrance to the Unknown Dungeon | ||
| Snore Ball | Southwest of the portal to the Cave of Origin | ||
| TM06 Toxic | West of the portal to the Cave of Origin | ||
| Pixie Plate | Southwest of the waterfall | ||
| Chatotite | Above the waterfall (requires Waterfall) | ||
Pokémon Tower
| Item | Location | ||
|---|---|---|---|
| Choice Scarf | 1F; northeast of the entrance to the Unknown Dungeon | ||
| Eviolite | 2F; southwest of the stairs leading down to the first floor | ||
Citadark Isle
| Item | Location | ||
|---|---|---|---|
| Timer Ball | Northwestern corner of the area | ||
Giant Chasm
| Item | Location | ||
|---|---|---|---|
| Max Potion | Left of the portal to Citadark Isle | ||
| Super Repel | Southeastern corner of the area | ||
| Full Heal | Northwest of the portal to Spear Pillar | ||
| TM02 Dragon Claw | Northwest of the portal to Spear Pillar | ||
| Rare Candy | In a big rock left of the DNA Splicers (hidden) | ||
| DNA Splicers | Middle of the area (requires Rock Climb) | ||
Spear Pillar
| Item | Location | ||
|---|---|---|---|
| Hard Stone | Right part of the area behind a wall and a pillar | ||
| Meganiumite | Behind the wall in the northwestern corner | ||
Pokémon
Moltres is found by using the Relic Song on the northern wall within Citadark Isle.
Dialga is found at the end area of the Spear Pillar by using Rock Climb after the player clears the Elite Four rematches.
Palkia is found towards the end of the Hall of Legends after the player clears the Elite Four rematches.
Zygarde is found in the middle of Terminus Cave after the player defeats or captures Zygarde at the Dragon Ruins.
Starting Area
| Pokémon | Location | Levels | Rate | |||||||
|---|---|---|---|---|---|---|---|---|---|---|
|
|
67-72 | 34% | |||||||
|
|
67-72 | 16% | |||||||
|
|
67-72 | 34% | |||||||
|
|
67-72 | 16% | |||||||


Pokémon Mansion
| Pokémon | Location | Levels | Rate | |||||||
|---|---|---|---|---|---|---|---|---|---|---|
|
|
26-28 | 15% | |||||||
|
|
32-36 | 30% | |||||||
|
|
30-32 | 15% | |||||||
|
|
28 | 5% | |||||||
|
|
28-30 | 30% | |||||||
|
|
32 | 5% | |||||||


Naragex Forest
| Pokémon | Location | Levels | Rate | |||||||
|---|---|---|---|---|---|---|---|---|---|---|
|
|
10-15 | 1% | |||||||
|
|
10-15 | 1% | |||||||
|
|
4-5 | 20% | |||||||
|
|
4-5 | 10% | |||||||
|
|
4-5 | 8% | |||||||
|
|
4-5 | 10% | |||||||
|
|
4-5 | 20% | |||||||
|
|
4-5 | 10% | |||||||
|
|
4-5 | 20% | |||||||


Cave of Origin
| Pokémon | Location | Levels | Rate | |||||||
|---|---|---|---|---|---|---|---|---|---|---|
|
|
28-35 | 90% | |||||||
|
|
33-36 | 10% | |||||||


Pokémon Village
Despite the grass patches and the river, there are no wild Pokémon obtainable in the Pokémon Village.
Pokémon Tower
| Pokémon | Location | Levels | Rate | |||||||
|---|---|---|---|---|---|---|---|---|---|---|
|
|
13-19 | 90% | |||||||
|
|
20 | 1% | |||||||
|
|
15-17 | 9% | |||||||


Citadark Isle
| Pokémon | Location | Levels | Rate | |||||||
|---|---|---|---|---|---|---|---|---|---|---|
| Special Pokémon | ||||||||||
|
|
100 | One | |||||||

Spear Pillar
| Pokémon | Location | Levels | Rate | |||||||
|---|---|---|---|---|---|---|---|---|---|---|
| Special Pokémon | ||||||||||
|
|
110 | One | |||||||

Terminus Cave
| Pokémon | Location | Levels | Rate | |||||||
|---|---|---|---|---|---|---|---|---|---|---|
|
|
44-48 | 20% | |||||||
|
|
44-48 | 20% | |||||||
|
|
44-48 | 10% | |||||||
|
|
44-48 | 10% | |||||||
|
|
44-48 | 40% | |||||||
| Special Pokémon | ||||||||||
|
|
50 | One | |||||||


Hall of Legends
| Pokémon | Location | Levels | Rate | |||||||
|---|---|---|---|---|---|---|---|---|---|---|
| Special Pokémon | ||||||||||
|
|
110 | One | |||||||

Trainers
Rescuing Nora
| Trainer | Pokémon | |||||||||||
|---|---|---|---|---|---|---|---|---|---|---|---|---|
|
| |||||||||||
| ||||||||||||
|
| |||||||||||
| ||||||||||||
|
| |||||||||||
| ||||||||||||
|
| |||||||||||
|
| |||||||||||
| ||||||||||||
|
| |||||||||||
| ||||||||||||
|
| |||||||||||
| ||||||||||||
|
| |||||||||||
| ||||||||||||
|
| |||||||||||
| ||||||||||||
| ||||||||||||
|
| |||||||||||
| ||||||||||||
| ||||||||||||
|
| |||||||||||
| ||||||||||||


Pursuing Reukra
|
||||||||||||||||||||||||||||||||||||
| ||||||||||||||||||||||||||||||||||||

|
||||||||||||||||||||||||||||||||||
| ||||||||||||||||||||||||||||||||||
|
||||||||||||||||||||||||||||||||||
| ||||||||||||||||||||||||||||||||||

|
|||||||||||||||||||||||||||||||||||||||||||||||||||||||||||||||||||||||
| |||||||||||||||||||||||||||||||||||||||||||||||||||||||||||||||||||||||

Trivia
- In addition to the encounters for most areas matching those found in the games that they are derived from, the Mysterious Grunts all use Pokémon that were either used by trainers or were found in the wild in these areas in the aforementioned games.
- Despite the fact that Insurgence happens after the destruction of Cinnabar Island, one of the locations in the Void Gauntlet is the Pokemon Mansion, which would have been destroyed. This either indicates that the player's journey through this area is independent of all timelines associated with the core series plotlines or that the player's journey takes place in parallel universes where certain events did not occur.