|
|
| (2 intermediate revisions by the same user not shown) |
| Line 28: |
Line 28: |
| {{Itemlist|Awakening|Area 1; on the ground, north of Parasol Lady Yvonne|display={{BLink|Awakening}}}} | | {{Itemlist|Awakening|Area 1; on the ground, north of Parasol Lady Yvonne|display={{BLink|Awakening}}}} |
| {{Itemlist|Burn Heal|Area 1; in a rock to the west of the Awakening ''(hidden)''|display={{BLink|Burn Heal}}}} | | {{Itemlist|Burn Heal|Area 1; in a rock to the west of the Awakening ''(hidden)''|display={{BLink|Burn Heal}}}} |
| {{Itemlist|Normaltm|Area 1; western part of the map (requires {{m|Surf}})|display={{BLink|TM110 Round}}}} | | {{Itemlist|Normaltm|Area 1; western part of the map (requires {{m|Surf}})|display=TM110 {{BLink|Round}}}} |
| {{Itemlist|Helix Fossil|Area 2; southwestern cluster of rocks on top of the platform|display={{BLink|Helix Fossil}}}} | | {{Itemlist|Helix Fossil|Area 2; southwestern cluster of rocks on top of the platform|display={{BLink|Helix Fossil}}}} |
| {{Itemlist|Dome Fossil|Area 2; northwestern cluster of rocks on top of the platform|display={{BLink|Dome Fossil}}}} | | {{Itemlist|Dome Fossil|Area 2; northwestern cluster of rocks on top of the platform|display={{BLink|Dome Fossil}}}} |
| {{Itemlist|Claw Fossil|Area 2; northeastern cluster of rocks on top of the platform|display={{BLink|Claw Fossil}}}} | | {{Itemlist|Claw Fossil|Area 2; northeastern cluster of rocks on top of the platform|display={{BLink|Claw Fossil}}}} |
| {{Itemlist|Armor Fossil|Area 2; southeastern cluster of rocks on top of the platform|display={{BLink|Armor Fossil}}}} | | {{Itemlist|Armor Fossil|Area 2; southeastern cluster of rocks on top of the platform|display={{BLink|Armor Fossil}}}} |
| {{Itemlist|Absolite|Area 2; northern part of the map (requires [[Heart Swap]])|display={{BLink|Absolite}}}} | | {{Itemlist|Absolite|Area 2; northern part of the map (requires [[Heart Swap]])|display={{DL|Mega Stone|Absolite}}}} |
| {{Itlistfoot|cave}} | | {{Itlistfoot|cave}} |
|
| |
|
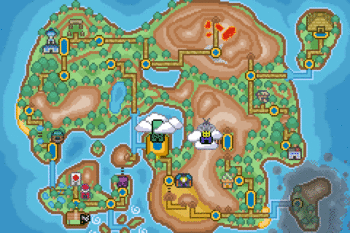
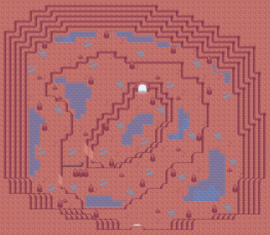
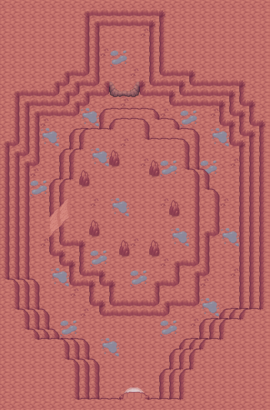
Midna Mine is a mine in the northern part of Midna Town next to the Trainer School.
Walkthrough
- As the path here is very straightforward, simply head down to the second area while exploring the rest of the cave.
- In Area 2, walk up the stairs leading to the top of a platform to find Nora.
- After reading Nora's dialogue, leave the mine.
Items
| Item
|
Location
|

|
Potion
|
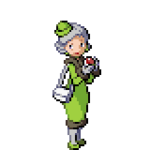
- Area 1; in a rock to the north of Ace Trainer Donatello (hidden)
- Area 1; in a rock directly east of the Escape Rope (hidden)
|

|
Escape Rope
|
Area 1; northeast of Ace Trainer Donatello
|

|
Super Potion
|
Area 1; southwestern corner
|

|
Full Heal
|
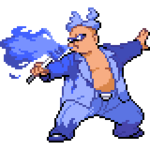
Area 1; in the third rock standing in a row southeast of Firebreather Ninra (hidden)
|

|
Poké Ball
|
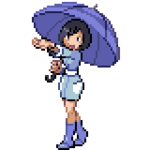
Area 1; in a rock southwest of Parasol Lady Yvonne (hidden)
|

|
Awakening
|
Area 1; on the ground, north of Parasol Lady Yvonne
|

|
Burn Heal
|
Area 1; in a rock to the west of the Awakening (hidden)
|

|
TM110 Round
|
Area 1; western part of the map (requires Surf)
|

|
Helix Fossil
|
Area 2; southwestern cluster of rocks on top of the platform
|

|
Dome Fossil
|
Area 2; northwestern cluster of rocks on top of the platform
|

|
Claw Fossil
|
Area 2; northeastern cluster of rocks on top of the platform
|

|
Armor Fossil
|
Area 2; southeastern cluster of rocks on top of the platform
|

|
Absolite
|
Area 2; northern part of the map (requires Heart Swap)
|
|
|
Rock Smash
Pokémon
| Pokémon
|
Location
|
Levels
|
Rate
|
|
|
|
10-12
|
15%
|
|
|
|
10-12
|
10%
|
|
|
|
10-12
|
30%
|
|
|
|
10-12
|
30%
|
|
|
|
10-12
|
10%
|
|
|
|
10-12
|
5%
|
| Surfing
|
|
|
|
10-12
|
65%
|
|
|
|
10-12
|
35%
|
| Fishing
|
|
|
|
10-12
|
70%
|
|
|
|
10-12
|
30%
|
|
|
|
10-12
|
60%
|
|
|
|
10-12
|
20%
|
|
|
|
10-12
|
20%
|
|
|
|
10-12
|
40%
|
|
|
|
10-12
|
40%
|
|
|
|
10-12
|
15%
|
|
|
|
10-12
|
5%
|
| Rock Smash
|
|
|
|
Scales with Party Pokémon
|
33%
|
|
|
|
Scales with Party Pokémon
|
8.5%
|
|
|
|
Scales with Party Pokémon
|
16.5%
|
|
|
|
Scales with Party Pokémon
|
25%
|
|
|
|
Scales with Party Pokémon
|
8.5%
|
|
|
|
Scales with Party Pokémon
|
8.5%
|
|
|
Trainers
Layout
| Area 1
|
Area 2
|
|
|